This is the multi-page printable view of this section. Click here to print.

Return to the regular view of this page.

Connectivity

Introduction to IIoT Connections and Data Sources Management in the United Manufacturing Hub.

In IIoT infrastructures, sometimes can be challenging to extract and contextualize data from from various systems into the Unified Namespace, because there is no universal solution. It usually requires lots of different tools, each one tailored to the specific infrastructure, making it hard to manage and maintain.

With the United Manufacturing Hub and the Management Console, we aim to solve this problem by providing a simple and easy to use tool to manage all the assets in your factory.

For lack of a better term, when talking about a system that can be connected to and that provides data, we will use the term asset.

When should I use it?

Contextualizing data can present a variety of challenges, both technical and at the organization level. The Connection Management functionality aims to reduce the complexity that comes with these challenges.

Here are some common issues that can be solved with the Connection Management:

  • It is hard to get an overview of all the data sources and their connections' status, as the concepts of “connection” and “data source” are often decoupled. This leads to list the connections’ information into long spreadsheets, which are hard to maintain and troubleshoot.
  • Handling uncommon communication protocols.
  • Dealing with non-standard connections, like a 4-20 mA sensor or a USB-connected barcode reader.
  • Advanced IT tools like Apache Spark or Apache Flink may be challenging for OT personnel who have crucial domain knowledge.
  • Traditional OT tools often struggle in modern IT environments, lacking features like Docker compatibility, monitoring, automated backups, or high availability.

What can I do with it?

Connection Management

The Connection Management functionality in the Management Console aims to address those challenges by providing a simple and easy to use tool to manage all the assets in your factory.

You can add, delete, and most importantly, visualize the status of all your connections in a single place. For example, a periodic check is performed to measure the latency of each connection, and the status of the connection is displayed in the Management Console.

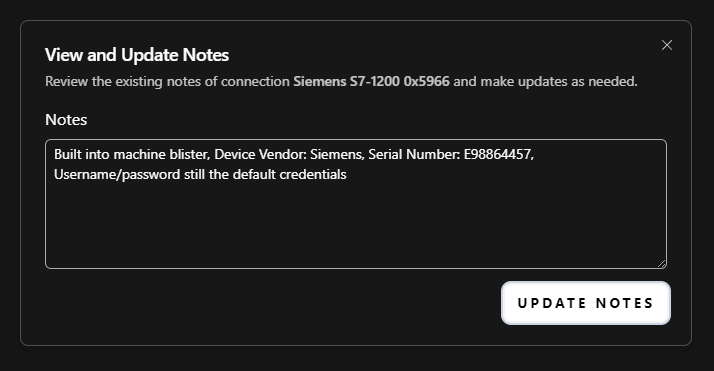
You can also add notes to each connection, so that you can keep all the documentation in a single place.

Connection Notes
Connection Notes

You can then configure a data source for each connection, to start extracting data from your assets. Once the data source is configured, specific information about its status is displayed, prompting you in case of misconfigurations, data not being received, or other any error that may occur.

How can I use it?

Add new connections from the Connection Management page of the Management Console. Then, configure a data source for each of them by choosing one of the available tools, depending on the type of connection.

The following tools come with the United Manufacturing Hub and are recommended for extracting data from your assets:

Node-RED

Node-RED is a leading open-source tool for IIoT connectivity. We recommend this tool for prototyping and integrating parts of the shop floor that demand high levels of customization and domain knowledge.

Even though it may be unreliable in high-throughput scenarios, it has a vast global community that provides a wide range of connectors for different protocols and data sources, while remaining very user-friendly with its visual programming approach.

Benthos UMH

Benthos UMH is a custom extension of the Benthos project. It allows you to connect assets that communicate via the OPC UA protocol, and it is recommended for scenarios involving the extraction of large data volumes in a standardized format.

It is a lightweight, open-source tool that is easy to deploy and manage. It is ideal for moving medium-sized data volumes more reliably then Node-RED, but it requires some technical knowledge.

Other Tools

The United Manufacturing Hub also provides tools for connecting data sources that uses other types of connections. For example, you can easily connect ifm IO-Link sensors or USB barcode readers.

Third-Party Tools

Any existing connectivity solution can be integrated with the United Manufacturing Hub, assuming it can send data to either MQTT or Kafka. Additionally, if you want to deploy those tools on the Device & Container Infrastructure, they must be available as a Docker container (developed with best-practices). Therefore, we recommend using the tools mentioned above, as they are the most tested and reliable.

What are the limitations?

Some of the tools still require some technical knowledge to be used. We are working on improving the user experience and documentation to make them more accessible.

Where to get more information?

1 - Node-RED

Connect devices on the shop floor using Node-RED with United Manufacturing Hub’s Unified Namespace. Simplify data integration across PLCs, Quality Stations, and MES/ERP systems with a user-friendly UI.

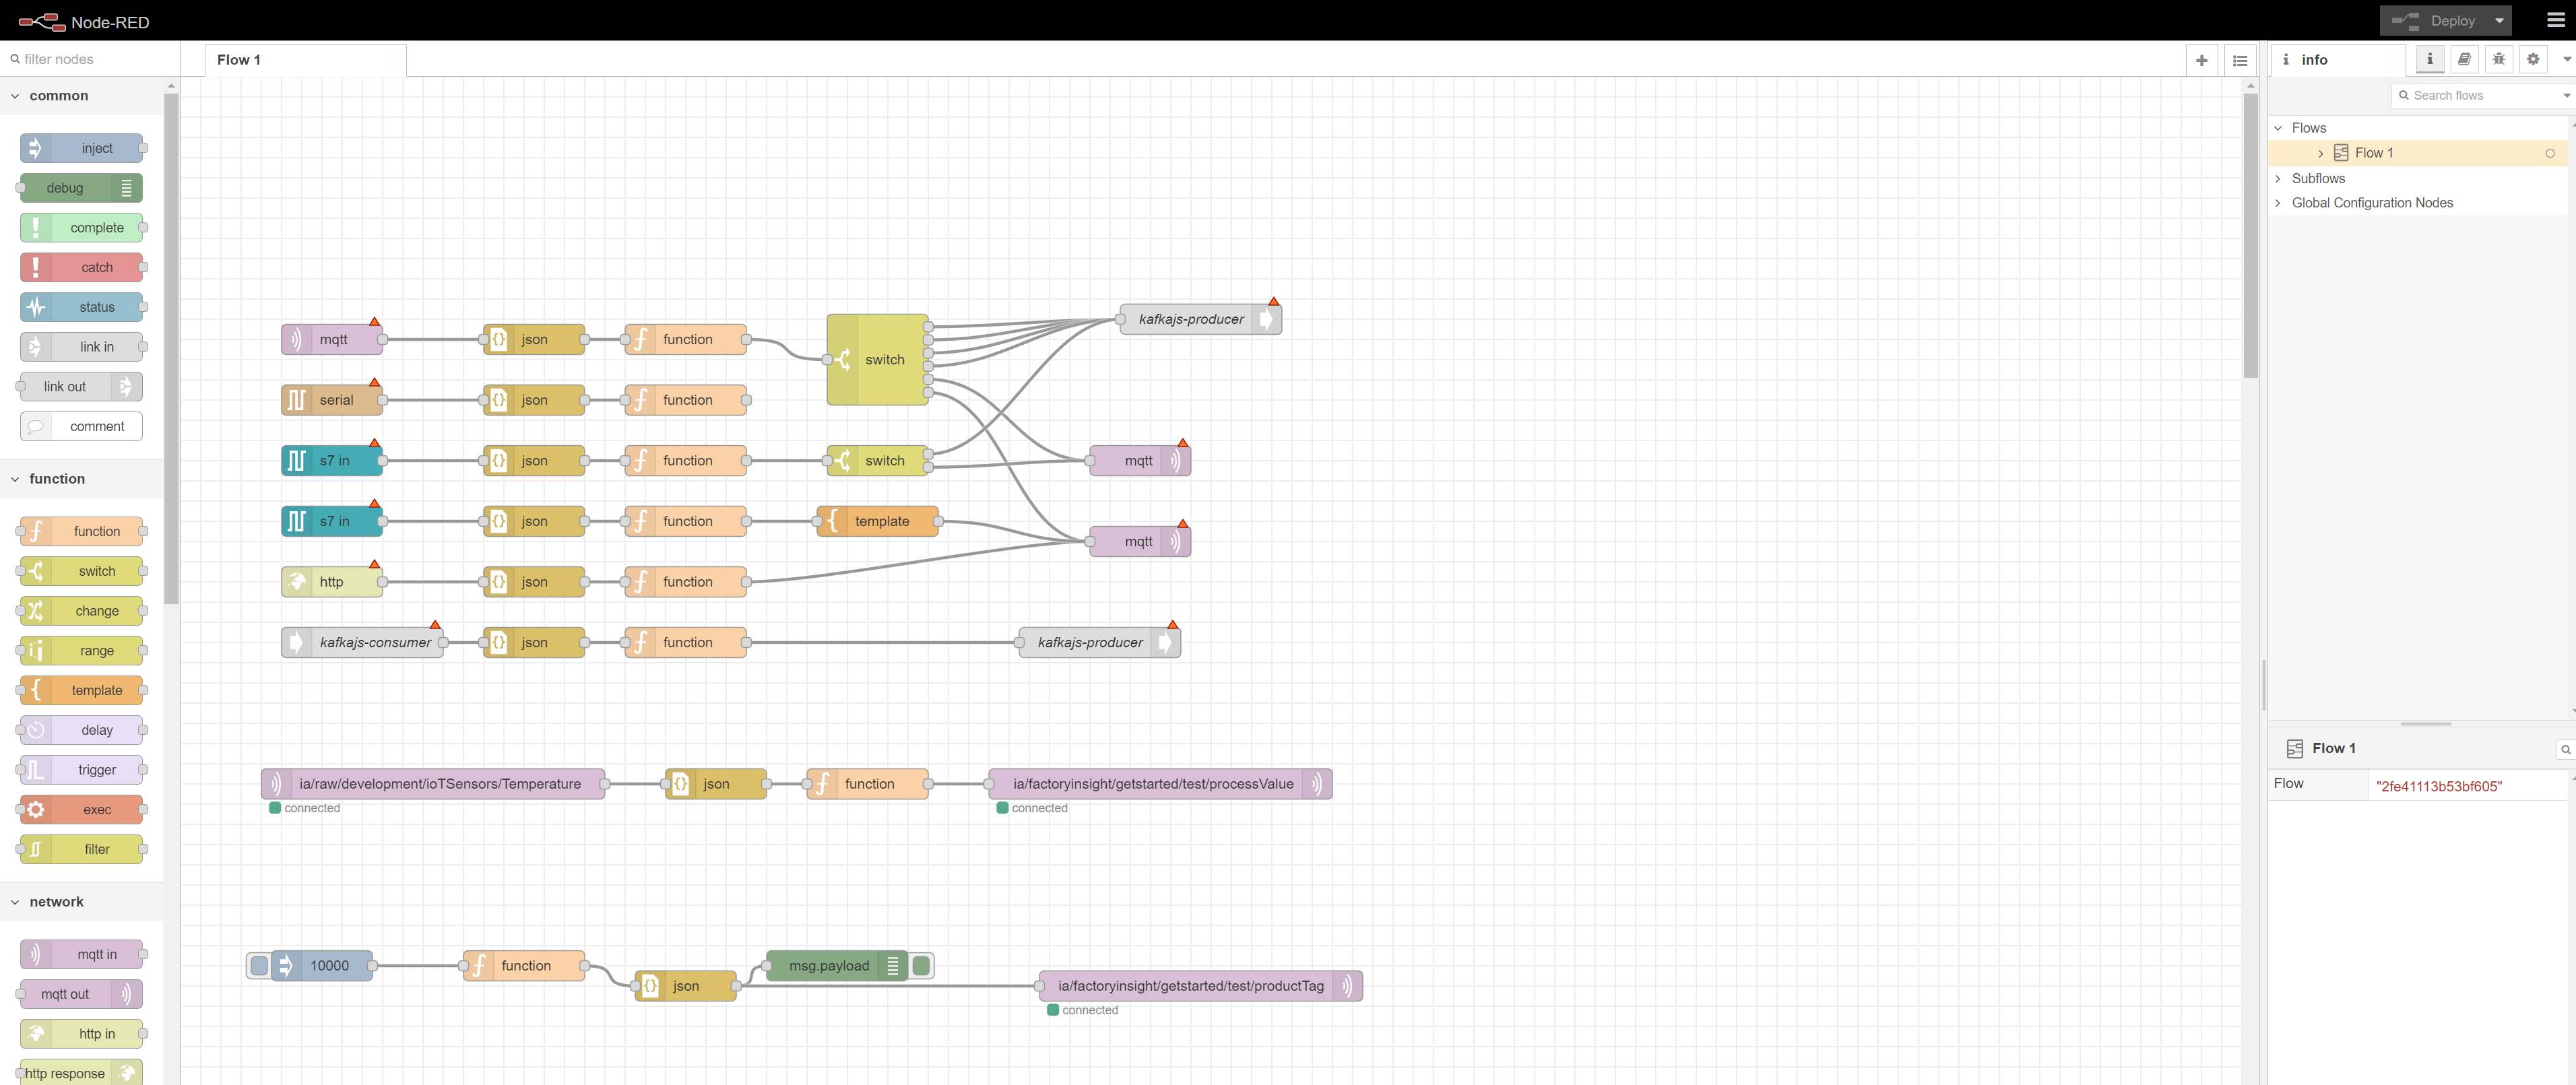
One feature of the United Manufacturing Hub is to connect devices on the shopfloor such as PLCs, Quality Stations or MES / ERP systems with the Unified Namespace using Node-RED. Node-RED has a large library of nodes, which lets you connect various protocols. It also has a user-friendly UI with little code, making it easy to configure the desired nodes.

When should I use it?

Sometimes it is necessary to connect a lot of different protocols (e.g Siemens-S7, OPC-UA, Serial, …) and node-RED can be a maintainable solution to connect all these protocols without the need for other data connectivity tools. Node-RED is largely known in the IT/OT-Community making it a familiar tool for a lot of users.

What can I do with it?

By default, there are connector nodes for common protocols:

  • connect to MQTT using the MQTT node
  • connect to HTTP using the HTTP node
  • connect to TCP using the TCP node
  • connect to IP using the UDP node

Furthermore, you can install packages to support more connection protocols. For example:

You can additionally contextualize the data, using function or other different nodes do manipulate the received data.

How can I use it?

Node-RED comes preinstalled as a microservice with the United Manufacturing Hub.

  1. To access Node-RED, simply open the following URL in your browser:
http://<instance-ip-address>:1880/nodered
  1. Begin exploring right away! If you require inspiration on where to start, we provide a variety of guides to help you become familiar with various node-red workflows, including how to process data and align it with the UMH datamodel:

What are the limitations?

  • Most packages have no enterprise support. If you encounter any errors, you need to ask the community. However, we found that these packages are often more stable than the commercial ones out there, as they have been battle tested by way more users than commercial software.
  • Having many flows without following a strict structure, leads in general to confusion.
  • One additional limitation is “the speed of development of Node-RED”. After a big Node-RED and JavaScript update dependencies most likely break, and those single community maintained nodes need to be updated.

Where to get more information?

2 - Benthos UMH

Configure protocol converters to stream data to the Unified Namespace directly in the Management Console.

Benthos is a stream processing tool that is designed to make common data engineering tasks such as transformations, integrations, and multiplexing easy to perform and manage. It uses declarative, unit-testable configuration, allowing users to easily adapt their data pipelines as requirements change. Benthos is able to connect to a wide range of sources and sinks, and can use different languages for processing and mapping data.

Benthos UMH is a custom extension of Benthos that is designed to connect to OPC-UA servers and stream data into the Unified Namespace.

When should I use it?

Benthos UMH is valuable for integrating different protocols with the Unified Namespace. With it, you can configure various protocol converters, define the data you want to stream, and send it to the Unified Namespace.

Furthermore, in our tests, Benthos has proven more reliable than tools like Node-RED, when it comes to handling large amounts of data.

What can I do with it?

Benthos UMH offers some benefits, including:

  • Management Console integration: Configure and deploy any number of protocol converters via Benthos UMH directly from the Management Console.
  • OPC-UA support: Connect to any OPC-UA server and stream data into the Unified Namespace.
  • Report by exception: By configuring the OPC-UA nodes in subscribe mode, you can only stream data when the value of the node changes.
  • Per-node configuration: Define the nodes you want to stream and configure them individually.
  • Broad customization: Use Benthos’ extensive configuration options to customize your data pipeline.
  • Easy deployment: Deploy Benthos UMH as a standalone Docker container or directly from the Management Console.
  • Fully open source: Benthos UMH is fully open source and available on Github.

How can I use it?

With the Management Console

The easiest way to use Benthos UMH is to deploy it directly from the Management Console.

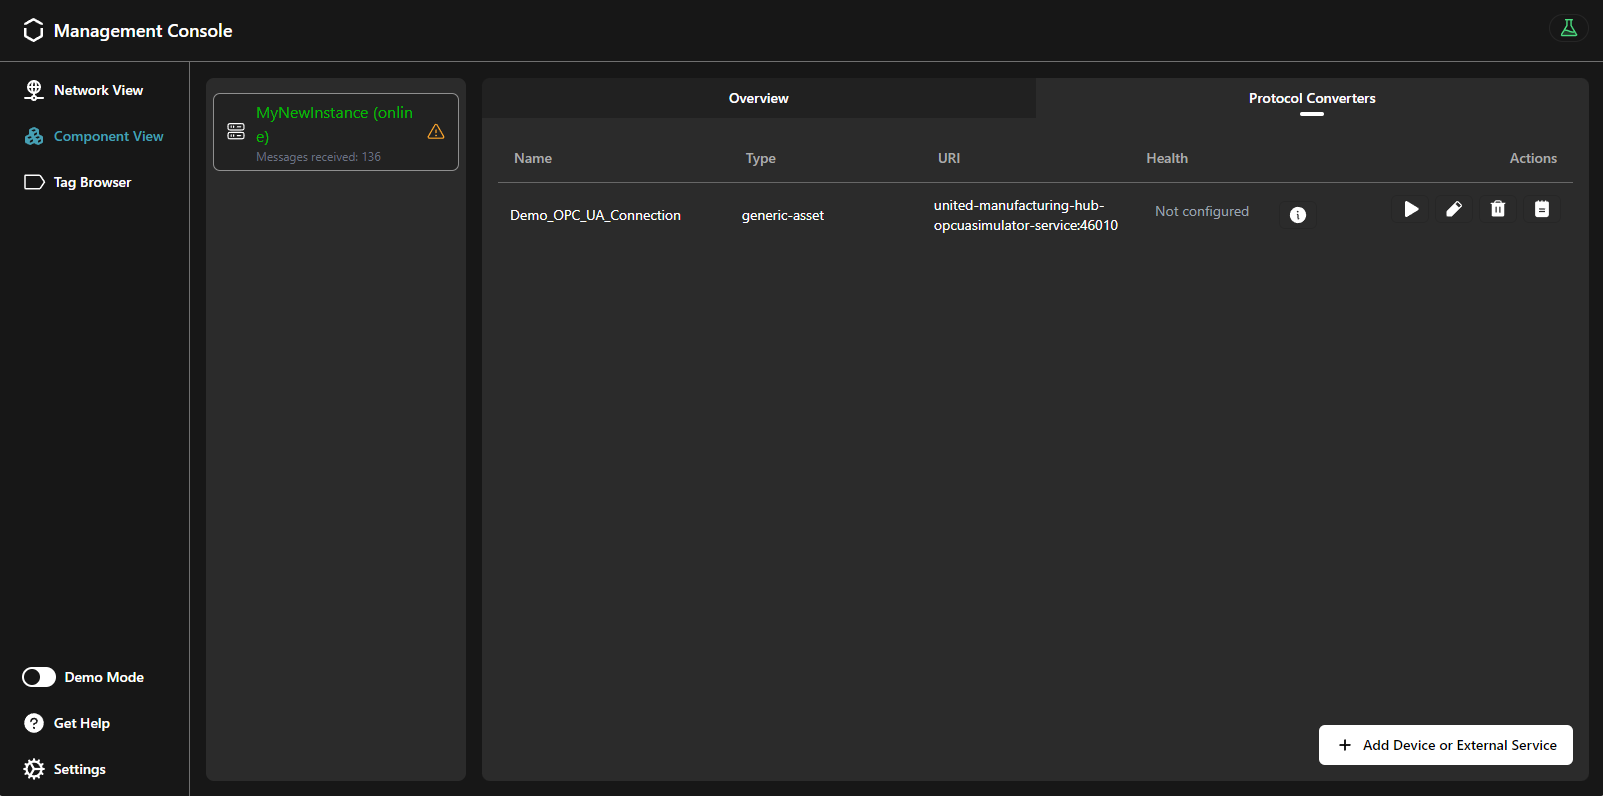
After adding your network device or service, you can initialize the protocol converter. Simply click on the Play button next to the network device/service at the Protocol Converters tab. From there, you’ll have two options to choose from when configuring the protocol converter:

  • OPC-UA: Select this option if you specifically need to configure OPC-UA protocol converters. It offers direct integration with OPC-UA servers and improved data contextualization. This is particularly useful when you need to assign tags to specific data points within the Unified Namespace. You’ll be asked to define OPC-UA nodes in YAML format, detailing the nodes you want to stream from the OPC-UA server.

  • Universal Protocol Converter: Opt for this choice if you need to configure protocol converters for various supported protocols other than OPC-UA. This option will prompt you to define the Benthos input and processor configuration in YAML format.

For OPC-UA, ensure your YAML configuration follows the format below:

nodes:
  - opcuaID: ns=2;s=Pressure
    enterprise: pharma-genix
    site: aachen
    area: packaging
    line: packaging_1
    workcell: blister
    originID: PLC13
    tagName: machineState
    schema: _historian

Required fields are opcuaID, enterprise, tagName and schema. opcuaID is the NodeID in OPC-UA and can also be a folder (see README for more information). The remaining components are components of the resulting topic / ISA-95 structure (see also our datamodel). By default, the schema will always be in _historian, and tagName is the keyname.

Standalone

Benthos UMH can be manually deployed as part of the UMH stack using the provided Docker image and following the instructions outlined in the README.

For more specialized use cases requiring precise configuration, standalone deployment offers full control over the setup. However, this manual approach is more complex compared to using the Universal Protocol Converter feature directly from the Management Console.

Read the official Benthos documentation for more information on how to use different components.

What are the limitations?

Benthos UMH excels in scalability, making it a robust choice for complex setups managing large amounts of data. However, its initial learning curve may be steeper due to its scripting language and a more hands-on approach to configuration.

As an alternative, Node-RED offers ease of use with its low-code approach and the popularity of JavaScript. It’s particularly easy to start with, but as your setup grows, it becomes harder to manage, leading to confusion and loss of oversight.

Where to get more information?

3 - Other Tools

3.1 - Retrofitting with ifm IO-link master and sensorconnect

Upgrade older machines with ifm IO-Link master and Sensorconnect for seamless data collection and integration. Retrofit your shop floor with plug-and-play sensors for valuable insights and improved efficiency.

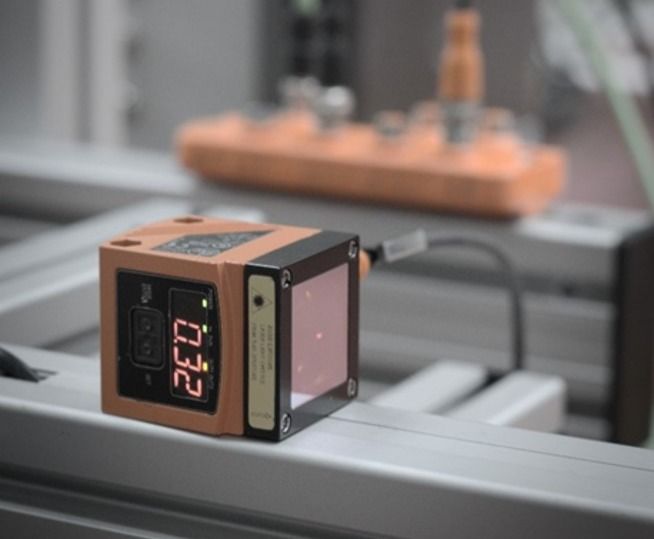
Retrofitting older machines with sensors is sometimes the only-way to capture process-relevant information. In this article, we will focus on retrofitting with ifm IO-Link master and Sensorconnect, a microservice of the United Manufacturing Hub, that finds and reads out ifm IO-Link masters in the network and pushes sensor data to MQTT/Kafka for further processing.

When should I use it?

Retrofitting with ifm IO-Link master such as the AL1350 and using Sensorconnect is ideal when dealing with older machines that are not equipped with any connectable hardware to read relevant information out of the machine itself. By placing sensors on the machine and connecting them with IO-Link master, required information can be gathered for valuable insights. Sensorconnect helps to easily connect to all sensors correctly and properly capture the large amount of sensor data provided.

What can I do with it?

With ifm IO-Link master and Sensorconnect, you can collect data from sensors and make it accessible for further use. Sensorconnect offers:

  • Automatic detection of ifm IO-Link masters in the network.
  • Identification of IO-Link and alternative digital or analog sensors connected to the master using converter such as the DP2200. Digital Sensors employ a voltage range from 10 to 30V DC, producing binary outputs of true or false. In contrast, analog sensors operate at 24V DC, with a current range spanning from 4 to 20 mA. Utilizing the appropriate converter, analog outputs can be effectively transformed into digital signals.
  • Constant polling of data from the detected sensors.
  • Interpreting the received data based on a sensor database containing thousands of entries.
  • Sending data in JSON format to MQTT and Kafka for further data processing.

How can I use it?

To use ifm IO-link gateways and Sensorconnect please follow these instructions:

  1. Ensure all IO-Link gateways are in the same network or accessible from your instance of the United Manufacturing Hub.
  2. Retrofit the machines by connecting the desired sensors and establish a connection with ifm IO-Link gateways.
  3. Deploy the sensorconnect feature and configure the Sensorconnect IP-range to either match the IP address using subnet notation /32, or, in cases involving multiple masters, configure it to scan an entire range, for example /24. To deploy the feature and change the value, execute the following command with your IP range:
    sudo $(which helm) upgrade --kubeconfig /etc/rancher/k3s/k3s.yaml  -n united-manufacturing-hub united-manufacturing-hub united-manufacturing-hub/united-manufacturing-hub --set _000_commonConfig.datasources.sensorconnect.enabled=true,_000_commonConfig.datasources.sensorconnect.iprange=<ip-range> --reuse-values --version $(sudo $(which helm) ls --kubeconfig /etc/rancher/k3s/k3s.yaml  -n united-manufacturing-hub -o json | jq -r '.[0].app_version')
    
  4. Once completed, the data should be available in your Unified Namespace.

What are the limitations?

  • The current ifm firmware has a software bug, that will cause the IO-Link master to crash if it receives to many requests. To resolve this issue, you can either request an experimental firmware, which is available exclusively from ifm, or re-connect the power to the IO-Link gateway.

Where to get more information?

3.2 - Retrofitting with USB barcodereader

Integrate USB barcode scanners with United Manufacturing Hub’s barcodereader microservice for seamless data publishing to Unified Namespace. Ideal for inventory, order processing, and quality testing stations.

The barcodereader microservice enables the processing of barcodes from USB-linked scanner devices, subsequently publishing the acquired data to the Unified Namespace.

When should I use it?

When you need to connect a barcode reader or any other USB devices acting as a keyboard (HID). These cases could be to scan an order at the production machine from the accompanying order sheet. Or To scan material for inventory and track and trace.

What can I do with it?

You can connect USB devices acting as a keyboard to the Unified Namespace. It will record all inputs and send it out once a return / enter character has been detected. A lof of barcode scanners work that way. Additionally, you can also connect something like a quality testing station (we once connected a Mitutoyo quality testing station).

How can I use it?

To use the microservice barcode reader, you will need configure the helm-chart and enable it.

  1. Enable the barcodereader feature by executing the following command:
    sudo $(which helm) upgrade --kubeconfig /etc/rancher/k3s/k3s.yaml  -n united-manufacturing-hub united-manufacturing-hub united-manufacturing-hub/united-manufacturing-hub --set _000_commonConfig.datasources.barcodereader.enabled=true --reuse-values --version $(sudo $(which helm) ls --kubeconfig /etc/rancher/k3s/k3s.yaml  -n united-manufacturing-hub -o json | jq -r '.[0].app_version')
    
  2. During startup, it will show all connected USB devices. Remember yours and then change the INPUT_DEVICE_NAME and INPUT_DEVICE_PATH. Also set ASSET_ID, CUSTOMER_ID, etc. as this will then send it into the topic ia/ASSET_ID/.../barcode. You can change these values of the helm chart using helm upgrade. You find the list of parameters here. The following command should be executed, for example:
    sudo $(which helm) upgrade --kubeconfig /etc/rancher/k3s/k3s.yaml  -n united-manufacturing-hub united-manufacturing-hub united-manufacturing-hub/united-manufacturing-hub --set _000_commonConfig.datasources.barcodereader.USBDeviceName=<input-device-name>,_000_commonConfig.datasources.barcodereader.USBDevicePath=<input-device-path>,_000_commonConfig.datasources.barcodereader.machineID=<asset-id>,_000_commonConfig.datasources.barcodereader.customerID=<customer-id> --reuse-values --version $(sudo $(which helm) ls --kubeconfig /etc/rancher/k3s/k3s.yaml  -n united-manufacturing-hub -o json | jq -r '.[0].app_version')
    
  3. Scan a device, and it will be written into the topic ia/ASSET_ID/.../barcode.

Once installed, you can configure the microservice by setting the needed environment variables. The program will continuously scan for barcodes using the device and publish the data to the Kafka topic.

What are the limitations?

  • Sometimes special characters are not parsed correctly. They need to be adjusted afterward in the Unified Namespace.

Where to get more information?